
Author: Kevin

How to Align Garage Door Sensors

How to Align Garage Door Sensors

How to Align Garage Door Sensors

Your garage door plays a vital role in securing your home — faulty parts can cause operational issues including damage to the garage door or garage door opener and even personal injury. A properly functioning garage door and garage door opener provide convenience as an alternate entryway into your home and protect your vehicle and other stored belongings. An important component of garage door openers is the safety sensors that are found near the bottom on both sides of the garage door tracks. 

If you ever experience any issues or your garage door sensors are not working, the alignment may very well be the cause. This guide will help by providing steps on how to realign garage door sensors and answer a few commonly asked questions about them.

Steps to Align Your Garage Door Opener Sensors

Whether your garage door opener is LiftMaster or Genie, the safety sensors need to be properly aligned and functioning for the garage door and opener to work properly. For most units, if there’s a sensor issue, the automatic opener light will flash to let you know and the door will not be able to close from the remote control. Here’s how you can realign your Liftmaster garage door’s safety reversing sensors. 

1. Locate the Safety Sensors

You can find the sensors by going to a location no higher than 6” off the floor on or next to the garage door tracks. Each sensor will have an LED indicator – the indicator light may be green, red or orange. Regardless of color, the indicator light should be on and constant; if the indicator light is off, dim or flickering, adjustment will be required.

2. Review Sensor Position

The safety sensors should be positioned no higher than 6” off the floor. Make sure the sensors on each side of the door are at the same height. If they are not, the bracket may have been bumped by activities in the garage. Set the brackets at the same height as the first course of action to align the garage door opener safety sensors. Some brackets clip to the garage door track and can be popped off the track and popped back on, or even slid up or down the track. Other sensor brackets may be permanently secured and can be twisted back to align the sensors.

3. Loosen the Sensor Wing Nut

Ensure the sensors are at the same height — if the sensors are not aligned then additional adjustment is needed. Some manufacturers will secure the sensor to the sensor bracket with a wing nut while other manufacturers will have the sensor permanently affixed to the bracket. 

If there is a wing nut, loosen the wing nut by turning it counterclockwise and gently moving the sensor around in its loose position in the bracket. If the sensor does not have a wing nut but rather a permanent bracket then gently bending the bracket may be needed to align the sensors.

4. Check That the LED Light Stays On

If you’ve aligned the sensors correctly, the LED light will stay on without issue. If your sensors have the wing nut set up, then the last step would be to tighten the wing nut to secure the receiving sensor.

5. Identify the Flashing Light Signals

If loosening the wing nut or adjusting the sensor bracket has not solved the issue, the next step is to check the garage door opener’s diagnostics.

Depending on the model, your LiftMaster garage door opener will signal that something’s wrong by its self-diagnostic lights. On a LiftMaster Security+ 2.0 model, the up and down adjustment arrows located behind the light lens housing will flash up and down respectively. Understanding these self-diagnostic cues will help you diagnose problems with your garage door opener and sensors in the future. Misaligned or obstructed sensors will flash in the following way:

  • Up arrow: Four times
  • Down arrow: Six times

On other models, the learn button LED will flash 4 times every 10 seconds to signal a misaligned or obstructed sensor.

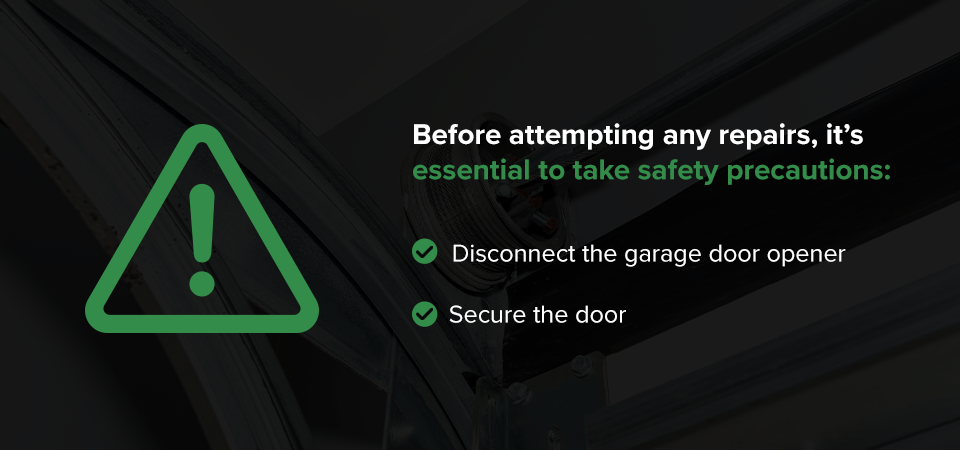
6. Test the Safety Reversing System

After any adjustments to your garage door opener, be sure to test the safety reversal mechanism to prevent injury. A properly functioning safety reversal mechanism should reverse on contact with objects 1.5″ in height. This can easily be tested by placing a 2×4 on your garage floor and closing your door. If you experience any issues, contact a certified technician.

Test the Safety Reversing System

Garage Door Sensor FAQs

Now that you’re equipped with knowledge on realigning your garage door sensors, you might have other questions you’d like answered relating to the topic. Below are a few of the most common questions and answers.

What Are Garage Door Sensors?

Garage door sensors are components that form part of the garage door opener unit. They work in conjunction by sending signals that alert the opener of obstructions or issues with the sensors, which in turn will prompt the opener to react accordingly. For example, if the sensors are misaligned, the garage door opener won’t receive the necessary instructions to close properly. Or, if there’s an obstruction, the garage door opener won’t close the door until the obstruction is removed. 

The main sensor parts include:

  • Two sensors with internal infrared beams
  • Sensor brackets to keep them in place
  • Screws or wing nuts to secure each sensor
  • Wiring to connect the sensors to the opener and power supply

The yellow or orange sending sensor signals the green receiving sensor through a connecting infrared beam. Once they meet, the opener will perform its function to close the garage door. The sending sensor is also called the transmitting sensor because it transmits the beam to the receiving sensor. 

How to Diagnose a Misaligned Sensor

Typically, a sensor is misaligned if the green receiver light flickers instead of staying on. The garage door opener arrow will flash up four times and down six times to signal this issue.

What Causes Misaligned Sensors?

There are a few reasons the sensors could be misaligned. They include:

  • Dusty or dirty sensor lenses
  • The sensors were knocked out of place by a person or object
  • Both sensor heights are not aligned, where one is higher or lower than the other
  • The mountings are damaged
  • They were installed incorrectly 

Let Hunter Door Sort Out Your Garage Door Issues

Let Hunter Door Sort Out Your Garage Door Issues

Knowing how to line up garage door sensors is fairly easy, but if you’re ever stuck, give us a call. Hunter Door has more than 50 years of experience, so we know our clients and what it takes to keep them happy. Our highly skilled service technicians deliver the best quality service with a smile and are always eager and ready to assist.

Whether you’re having issues with your garage door opener, sensors or anything else or you’re upgrading your garage entirely, let us know. Contact us to request an estimate today. 

Choosing the Best Garage Door Openers

Choosing the Best Garage Door Openers

Choosing The Best Garage Door Opener

Automatic garage door openers are a luxury that many take for granted — until they need repair or replacement. A dependable opener means you can access your garage from the comfort of your car with modern mobile technology. High-quality openers also feature security codes that allow only you or the people you trust to enter.

Garage Door Opener Options and Their Benefits

Selecting the ideal garage door opener depends on your door. The amount of power you need for an opener varies depending on the size and weight of your garage door. Consider these options:

  • Drive types: There are three primary garage door opener drives — chain, screw and belt. Although chain drives produce the most vibration and noise, they’re often the most powerful and economical. Screw drive openers have the fewest moving parts and usually require the least maintenance, while belt drive openers offer the least amount of noise. 
  • Horsepower options: While the size and weight of your door sometimes dictate your opener’s necessary horsepower, purchasing a more powerful opener often leads to longer dependable service and reliability. Typical options generally range from 1/3 to 3/4 horsepower.
  • Garage door sizes: Before committing to a new opener, you should ensure that it’ll work with your current door system. Most residential garage doors are 7 feet high, and many stock openers will accommodate this height. If you have a non-standard door size, your new opener may require modification.

What Are the Best Garage Door Openers?

Hunter Door offers several models of garage door openers featuring some of LiftMaster’s most innovative technology. Many of our models allow you to receive alerts and control your door from anywhere using the MyQ® app. Examples of our offerings include:

  • Contractor Series 8164W: LiftMaster’s Contractor Series 8164W chain drive opener offers some of the quietest opening technology of its kind.
  • Elite Series 8500W: The Elite Series 8500W is Liftmaster’s most advanced belt-driven opener.
  • LM84501: Liftmaster’s LM84501 features an ultra-quiet and durable belt drive and an invisible light beam system.
  • LM87504-267: The LM87504-267 belt drive motor contains a built-in 140-degree camera to let you see everything around you.
  • LM87802: The LM87802 model includes our highest-powered motor, featuring a heavy-duty chain drive and a sturdy I-beam rail system. 

Choose Hunter Door for Garage Door Openers Built to Last

At Hunter Door, we understand what it means to have a reliable and efficient garage door opener with the newest features. We offer some of the best openers and installation services in South Jersey, providing you with many years of safety, convenience, comfort and dependability down the road. Contact us today to learn more!

How to Program a Garage Door Remote and Change the Batteries

white clopay garage door

How to Program a Garage Door Remote and Change the Batteries

When it comes to opening your garage door, garage door opener remotes make life a lot easier. However, just like with a TV remote, it’s useless if it’s not programmed correctly or the batteries are dead. In the sections below, we’ll break down the general process of how to program your remote, along with some more specific methods for LiftMaster products. Along with looking at the step-by-step process for programming, we’ll also walk you through how to change the batteries in your remote.

How to Program Your Garage Door Remote

While programming a garage door remote, you first want to understand what the buttons mean — knowing the layout of your remote will make reprogramming easier. Be sure to examine your remote to ensure you know the location of each button. Then, you should check that your remote is the same brand as your garage door opener. Otherwise, it may not work, as they won’t be compatible.

With that knowledge, you can begin the general garage door remote programming process.

General Programming Process

  1. Get to an area where you can reach and examine your garage door opener – specifically the motorhead hanging from the ceiling.
  2. Inspect the garage door opener, looking for a button labeled “learn.” If you can’t find the button, take off the opener’s light cover and look inside, as it may not be located on the exterior.
  3. Press and release the button – normally there will be a light next to that button that illuminates to indicate you are ready to program the remote.  While the program light is on, press the button on the remote you wish to program. There is typically a 30-second window to program the remote between pressing the “learn” button and pressing the remote button.  Once programmed, the light next to the learn button that illuminated will be off.
  4. Once you confirm the program light is off, press the button programmed to check the programming. If the door opens, you’ve successfully programmed your remote.

How to Program a Standard LiftMaster Garage Door Remote

LiftMaster remote controls can be used for many devices including gates, garage doors, commercial door openers and external wired-in receivers. Using the steps below, you can reprogram your LiftMaster garage door remote:

  1. Locate the “learn” button on the garage door opener or receiver. This button will be on the same side as the antenna. The button may be green, orange, yellow, red or purple with a small LED light next to it.
  2. Depending on the model of your garage door opener, you may have to remove the lens to access the learn button.
  3. Press and release the “learn” button; be careful NOT to hold the “learn” button down too long or that may erase all programming.
  4. Within 30 seconds of pressing the “learn” button, press and hold for about three seconds the button on your new remote that you wish to use when controlling the garage door opener.
  5. The LED indicator on the garage door opener will turn off and/or the garage door operator lights will blink.
  6. Now, test the button on the door opener remote to ensure it operates the garage door opener.

How to Program a LiftMaster MAX Garage Door Remote

The LiftMaster MAX remote works with all 315MHz or 390Mhz LiftMaster garage door openers produced after January 1993. This includes all Chamberlain and Sears Craftsman openers that contain a green, orange, red, purple or yellow “learn” button. Note that each color indicates a different number of times you must press the “program” button — yellow is one, purple is two, red/orange is three and green is four.

  1. Close your garage door.
  2. Locate the “program” button on your garage door opener remote. This will be a bit different for each model — the 890MAX model has a small hole with a button inside that can be activated with a straighten paper clip while the 893MAX has a button on the back of the remote under the visor clip that can be activated by using the removed visor clip.
  3. Activate the remote “program” button as noted above until the indicator light illuminates on the front of the remote.
  4. Press and release the button you wish to program on the remote as many times as your colored “learn” button indicates then press one of the other two buttons on the remote; the indicator light on the front of the remote should be out.
  5. Press and release the garage door opener “learn” button then press and hold the remote button programmed in step 4 until the garage door opener light bulb blinks.
  6. Once the light bulb flashes, programming should be complete.
  7. Press the newly programmed remote button to operate your garage door.

If the above process doesn’t work, it may be best to review your manual or contact an expert for help.

How to Change Your Garage Door Remote Battery

Do you find yourself pressing the button on your garage door remote multiple times before it opens? The odds are that it’s time to replace the battery in your remote. While it’s a fairly easy process, it’s important to keep in mind that the remote may need to be reprogrammed after the battery is replaced.

LiftMaster myQ garage door opener

Here are some general instructions to change your garage door opener remote battery:

  1. Locate and access the battery compartment of the remote – there may be a “battery compartment cover” that slides off or pops open; for “newer” LiftMaster and Chamberlain remotes you will need to use the visor clip to separate the remote case – following along the seam between the front and back part of the remote case to find a “carve out” in which to put the visor clip and with a twist of the clip the front and back parts of the cover will pop apart.  **NOTE – it is best to do this with remote at room temperature (70 degrees or higher) as the remote case is plastic and will crack in cold conditions.
  2. After opening the case, locate and remove the battery.  Most newer LiftMaster and Chamberlain remotes us a CR2032 battery.  Install the new battery making sure it has been placed in the battery compartment correctly.
  3. With the new battery installed, carefully put the remote case back together.  Test the remote to confirm it activates the automatic opener; if not, follow the steps above to program your remote.

Choose Hunter Door for Your Garage Needs

With over 50 years of experience providing homeowners and builders with long-lasting garage doors and prompt, professional services and repairs, Hunter Door is your trusted partner in New Jersey. At Hunter Door, we carry quality products from Clopay, ProVia, LiftMaster and Genie, and our experienced staff is ready to help.

In addition, as an added benefit – Hunter Door will change the battery in your remote for FREE; simply bring the remote to our showroom and we’ll change the battery for FREE …. it’s our way of saying thank you to past, present and future customers!!

Are you looking to update your current garage door opener? Hunter Door carries LiftMaster garage door openers that include top of the line features with time-tested durability. Today’s most innovative garage door openers offer enhanced safety features and easy-to-use controls. Let us help you upgrade your garage door with a new garage door opener!

LiftMaster MyQ garage door opener

If you’re having problems with your garage door or garage door opener, give us a call or fill out our contact form today to request a service appointment.

The Importance of Garage Door Weatherstripping

man weatherstripping garage door

Importance Of Garage Door Weatherstripping

If you’re looking for ways to better guard the inside of your garage against the elements, weatherstripping could be the solution you need. Sealing your garage door helps protect your home and garage from temperature fluctuations. It can also help block rain, snow and ice from getting inside. If you want to use weatherstripping effectively, you should understand how it works and how to install it properly.

What Is Weatherstripping?

Weatherstripping involves sealing the gaps between your garage doors and the door frames, or the ground. The long strips of weatherstripping come in several different materials, such as rubber or vinyl. 

Even the most well-fitted garage doors have a few natural gaps that let in outside air, rain or other elements. Door sealing solutions will help prevent these outdoor elements from getting inside. You’ll better protect your assets and keep your garage comfortable year-round.  

Does Your Garage Need Weatherstripping?

If you’re wondering whether you need weatherstripping for your garage, consider a few main benefits you’ll gain from sealing your garage doors:


  • Better temperature regulation: With weatherstripping, you can fill gaps, keeping your garage warmer in the winter and cooler in the summer.
  • Improved protection from the elements: When you properly seal your garage doors, you’ll help prevent flooding and moisture-related rusting of your door components or stored equipment.
  • More secure storage: Better sealing can also keep unwanted critters out of your garage, so you won’t have to worry about rodents or insects invading a car, toolbox or other items you keep inside.


How to Install Weatherstripping

The weatherstripping process involves three main steps:


  1. Selecting the right material for the door type and insulation needs.
  2. Cutting the weatherstripping to the precise door size with a saw.
  3. Attaching the weatherstripping: On the sides and top, the perimeter seal is usually nailed to the door frame or side jambs.  The seal on the bottom, sometimes called astragal, usually slides into a groove formed on the bottom of the door or a groove in a retainer secured to the bottom of the door.  The bottom seal is sometimes specific to a door manufacturer – so it’s important to select the correct astragal


Professional Installation

If you want to get weatherstripping, it might be best to seek out a professional to install your weatherstripping instead of doing it yourself. The weatherstripping must be properly aligned with the door or else it won’t be any better than having no seal at all. Also, if the weatherstripping isn’t cut to the proper size or installed correctly, it can cause operational issues or even throw the door off its track.

If you want the most effective weatherproofing, you should hire a professional you trust to seal your garage doors.

Keep Your Garage Door in Top Condition With Hunter Door

At Hunter Door, we offer trusted services to handle your garage door maintenance needs. If you want the right team to provide weatherstripping installation and other garage door and garage door opener services for you, contact Hunter Door today.

brown clopay garage door

Garage Door Springs — What You Need to Know

Garage Door Springs — What You Need to Know 

Garage doors are your home’s largest moving part and are a crucial part of daily life. When your garage door is broken, it might be hard to identify the reason. When garage door springs wear out, they can cause several issues with your door’s operation. Depending on the garage door’s material, construction and size, it could weigh 100 pounds or more, and springs are essential for safely controlling this heavy weight. Garage door springs serve the purpose of assisting the door up and down with ease, whether opened with the machine or manually. Learn more about garage door springs and why it is so dangerous to try fixing them on your own.

How to Know If Your Garage Door Springs Are Broken 

What should you do if your garage door has a broken spring? Should you open a garage door with a broken spring? A faulty spring can damage your garage and cause an unsafe environment. We suggest checking your garage door’s operation monthly to reduce future hazards. 

When a garage door spring breaks, you will immediately be aware of the issue. The built-up tension and pressure will release, resulting in a loud banging garage door noise. 

If you are unsure whether your garage door springs are functioning correctly here are a few signs that can point to a faulty spring.

  • Garage door won’t open or close: If your garage door refuses to open, there’s likely a problem with the core components, either the opener or the springs. If your door will not open mechanically, check for signs of wear and call your garage door specialists to assess the issue. Additionally, if your garage door will not open manually, this is a direct sign of faulty springs. The door should open and close easily with the help of the springs. 
  • Misaligned or crooked door: Often, when a spring breaks, a garage door will become misaligned, uneven, stuck in its tracks or pushed off track. These issues can cause a noisy garage door.
  • Visible signs of wear: Wear and tear can also signify broken springs. Most commonly, separated or stretched springs occur. In this case, springs could be at risk of breaking, which can cause your garage door to come crashing down. 
  • Excessive movement: If you carefully watch your door’s movement, you might also detect a broken spring. A door might jerk when opened or closed, fall quickly with no control when attempting to close or open a few inches and stop dead in its tracks. 

Should I Replace My Garage Door Springs Myself? 

Once you’ve identified the issue, you might wonder if you can get the job done yourself. Because garage door springs are under extreme tension, you should always call trained professionals to replace them. There are many reasons this replacement is not a do-it-yourself job.

  • Proper tools: Just like any job, replacing garage door springs requires the correct tools for the job. Otherwise, there is a risk of injury to yourself or your garage door system. 
  • Spring sizing: The spring size needs to match the garage system’s function. Installing the incorrect spring can cause serious damage to the garage door itself or the opener system. 
  • Other hazards: Replacing extension springs without a professional can result in accidents such as a fallen garage door or dangerous cuts from rusted machinery. Replacing torsion springs can also be hazardous. These springs are under severe amounts of tension, and one wrong move can cause the spring to snap or unwind, sending metal debris flying. 

At Hunter Door, we offer professional services and repairs to ensure your garage door system’s safety. Skip out on the hazards of replacing garage door springs yourself and leave it to our team of experts!

Understanding the Types of Garage Door Springs 

Extension springs are long and skinny. They are parallel to the door’s tracks and store energy when stretched. 

  • Open-looped extension springs rely on a single wire at the end of the spring. They are also weaker compared to other extension springs. 
  • Double-looped extension springs represent the next step up from an open-looped extension spring. This spring has dual coils that connect to a pulley. 
  • Clipped-end extension springs are the most durable kind and tend to last longer.

Torsion springs are broad springs found on the shaft around the door opening. These springs, wound to specific torsion metrics, may have companion springs based on the door’s size and weight.

  • Standard torsion springs are typical features of lighter garage doors in a residential setting.
  • Early-set torsion springs are the same as standard springs, except they are in the middle of the shaft.
  • TorqueMaster torsion springs enclose the spring within a shaft held in place at the end of each torsion rod.


Our Services Go Beyond Broken Garage Door Springs 

At Hunter Door, we pride ourselves on providing quality products and services to our neighbors in Moorestown, N.J., and the surrounding communities. We offer garage doors, garage door repair and maintenance, plus entryway doors in different sizes and colors. The trusted brands we sell including Clopay and LiftMaster. Customize your new garage door with a wide range of style and color options.

We offer our repair and maintenance services in the South Jersey area, where our trained experts will assist with your garage door needs. Whether your job is big or small, trust Hunter Door to get the job done right. 

If you’re worried about your garage door’s performance or suspect you have a broken spring, we’re here to help anytime. Remember, these tasks can be dangerous if not performed by a trained professional. Let us take the stress out of your day — contact us today!


What to Do When Your Garage Door Won’t Open or Close

What to Do When Your Garage Door Won’t Open or Close

It can be very aggravating to try and figure out what is causing your garage door to not open or close effectively. There are multiple causes of why your garage door may not be working, and Hunter Door can happily fix them! Understanding what may be causing these issues is a great start to getting your garage door repaired correctly. Below, we will discuss common problems and solutions to ensure that your garage door is working as it should.  

Common Causes of Garage Door Problems Opening and Closing

There are various reasons as to why your garage door won’t open or close. Here are some common causes:

  • Electrical and power issues: Problems with the power supply or circuit breakers can prevent your garage door from functioning. A dead battery in the remote control can also cause the door to remain unresponsive.
  • Mechanical failures: Worn-out parts such as springs, cables or rollers can lead to mechanical failures.
  • Misalignment and obstruction: If the garage door track is misaligned or obstructed by debris, the door may struggle to open or close.

Why Won’t My Garage Door Close?

A garage door that won’t shut can be just as concerning. Common issues include:

  • Sensor issues and alignment: A photo eye on a garage door is also known as the sensors, which are two black boxes located on the bottom of your garage door. The purpose of these is to signal when an object may be getting in the way of your garage door closing. This part may have become misaligned over time, hindering your garage door from operating. 
  • Sensitivity and limit setting adjustments: Incorrect sensitivity settings on the garage door opener can lead to the door reversing before it closes.

How to Fix a Garage Door That Won’t Open

Below are some common solutions to resolve these problems. 

Electrical and Power Issues

For electronic issues:

  • Ensure the garage door opener is plugged in and that circuit breakers are functioning correctly.
  • Try replacing the batteries if your remote isn’t working.

Mechanical Failures

If you suspect your garage door is not operating due to mechanical errors:

  • Clear any debris from the tracks and ensure they are aligned properly.
  • Check that all rollers are in their tracks and not obstructed.

Sensor Issues

Here’s what to assess for malfunctioning sensors: 

  • Clean and align the safety sensors: Dust or misalignment can cause the sensors to malfunction. Make sure they are clean and facing each other.
  • Check for obstructions blocking the sensors: Remove any items that could be blocking the sensors’ line of sight.

Door Opener and Remote Control Problems

Is your remote control acting up? Consider the following:

  • Sometimes, the remote may need to be reprogrammed to communicate effectively with the opener.
  • Try resetting the opener according to the manufacturer’s instructions.

Manual Overrides and Locks

Consider switching your door to manual mode while you wait for professional service:

  • Locate and use the manual release cord: This allows you to operate the door manually in case of emergencies.
  • Check for engaged locks: Ensure no locks are engaged that would hinder the door from opening or closing.

Contact Us Today

Located in southern New Jersey and looking for a reliable garage door company to further assist you and your garage door needs? Hunter Door is your place to go! Contact us today to request an estimaterequest a service quote, or speak with our team. Hunter Door is a highly efficient and trustworthy company that is thrilled to assist your needs! Contact us today for more information!

The Pros and Cons of Steel Garage Doors

The Pros and Cons of Steel Garage Doors

When installing or buying a new garage door, it’s essential to choose the proper material. A well-constructed door provides better protection for your vehicles and enhances your home’s overall appearance. Steel is a common choice for modern garage doors. Like any material, though, steel offers a few pros and cons you should consider before making a purchase.

The Advantages of Steel Garage Doors

Steel garage doors are popular because of the overall value they provide. Some of the benefits of using steel include:

  • Versatility: Steel is a malleable material that can accommodate any style preference. You can use it to construct a garage door to suit your specific needs, such as an overhead door or a sectional door. Steel is also aesthetically adaptable, with many finishes and color options available.
  • Durability: A steel garage door offers more safety and security against the elements and day-to-day mishaps than wood or fiberglass. You can expect many productive years with a steel door since it’s more resistant to factors like harsh weather, denting and cracking.
  • Cost-effectiveness: The cost of a garage door can vary, but steel is often more budget-friendly than other construction materials. A steel garage door’s sturdiness and ease of maintenance mean you’ll save money on future repairs, too.
  • Sustainability: When it’s time for a new garage door, you can recycle your steel one. Many modern steel doors use recycled material, so you can help the environment even more if you opt for another one.

The Cons of Steel Overhead Garage Doors

Steel garage doors only have a few drawbacks worth considering. These disadvantages include:

  • Less insulation: Steel doors naturally provide less insulation than thicker materials like fiberglass. If you live in an area that’s prone to colder weather, you can look into buying an insulated steel door or insulate it yourself. A high R-value door will offer better insulation for your home. 
  • Susceptibility to rust: Steel garage doors are vulnerable to rust and corrosion. To prevent rusting, you should touch up any scratches as soon as possible and wash your door regularly.
  • Need for new paint: You’ll need to apply a fresh coat of paint every so often to keep your door in good condition. That said, painting offers an excellent opportunity to try new colors and enhance your door’s aesthetic appeal.

Look Into Our Garage Doors Today

It’s important to select a door that fits your personal preferences, needs and location. Whatever your choice, our expansive inventory ensures you’ll find the perfect garage door. We offer stylish, practical designs to complement any home. Contact us online to request an estimate.

How to Secure Your Garage Door Before a Lengthy Vacation

How to Secure Your Garage Door Before a Lengthy Vacation

When you go on vacation, you’re looking to relax. Before you leave, there are a few things you need to handle around the house to ensure you have a stress-free trip, including securing your home and garage entryways.

Your Vacation Checklist

Before going on vacation, you should create a checklist to make sure you have everything you need for vacation and to keep your house is safe when you’re gone. Besides the essentials like packing your bags, some items on your checklist may include:

  • Emptying the trash.
  • Watering your plants.
  • Turning off all appliances.
  • Locking up the house.

Locking your house is the most vital step on your checklist. Lock all the exterior doors and windows to your home. Don’t overlook the garage—make sure you lock your garage door to prevent intruders from accessing any part of your home while you’re gone.

How to Secure Your Garage Door

Securing your garage door is crucial to ensure no one enters your house while you’re gone on vacation. Check out these ways you can secure your garage door for a worry-free vacation:

1. Wireless Garage Door

Garage door openers have advanced over the years. Some models now offer smartphone compatibility, which lets you control, monitor and operate your garage door from anywhere. You can set up a specific ringtone on your phone to alert you when the door opens or closes, so you’re aware of any activity while you’re away.

2. Garage Door Opener Wall Console

When you’re looking for garage door security options, check your garage door opener wall console carefully. Your system may already have a vacation lock feature you can use. This feature disables handheld radio controls, digital keyless entry pads and vehicles with programming to operate the door to limit who can access your garage and how.

3. Locking Device

You can also secure your garage door with a locking device, which manually locks your door. There are two types of these devices:

  1. Inside lock: This lock goes on the inside of the door. You push a bar through a hole in the tracking to lock the door.
  2. Deadbolt lock: This lock has pieces on both sides of the door — a handle and key slot on the outside and a double lock bar on the inside. You turn the handle and extend the lock bar across the tracks, which a deadbolt holds in place. The only way to unlock the deadbolt is with a key.

The Benefits of Hunter Door

When you go on vacation, a garage door opener ensures your garage door stays locked and secure. Hunter Door offers over six types of garage door openers to keep your home safe. Our knowledgeable staff and skilled technicians can help you find the right opener and install it for you, giving you a prompt and professional experience from start to finish. We proudly serve communities throughout South Jersey.

Contact Us Today

Reach out to Hunter Door for all of your garage door opener installation, service and repair needs. To learn more about garage door openers, fill out our online contact form today. You can also call us at 856-265-0531 to speak to one of our team members.

View More Summer Garage Door Care Resources

How to Lubricate Your Noisy Garage Door

How to Lubricate Your Noisy Garage Door

If you own a home with a garage, you may know just how loud a garage door can be. Garage doors that aren’t lubricated regularly can become noisy and stop working properly over time. The best way to keep the noise of your door down and extend its life span is by lubricating your garage door’s metal parts at least every six months.

What Causes Garage Door Noise?

Many elements must work together for a garage door to open and close properly. Nearly all of these parts are made of metal and can create friction if they are not lubricated properly.

What to Do Before Using Lubricant

There are several important actions to complete pre-lubrication to ensure safety and success. 

1. Disconnect Power

Possibly the most important action to complete is to ensure that you’ve completely disconnected your garage door from power. That way, you’ll avoid the door opening or closing on you while you work.

2. Tighten Hardware

After disconnecting the power to your door, tighten your door’s hardware as needed. Additionally, check for any parts that are worn and have them replaced if necessary.

3. Clean Door Parts

To ensure that lubrication is applied effectively, clean every part of your door, from nuts and bolts to the chains and tracks. Cleaning will also prevent dirt buildup from causing rollers and springs to shake and make additional noise in the future. 

What’s the Best Type of Garage Door Lubricant?

Lubricating your garage door starts with the right product. Two types of garage door lubricants to use are:

  1. Silicone sprays: These sprays typically have a long thin straw to keep the spray contained and work great in small spaces. 
  2. White lithium grease: This product allows for application by hand, making it easier to spread on the needed area evenly. 

Where to Lubricate the Garage Door

Knowing the hotspots of friction can help you to apply lubrication in the correct places and increase your chances of lessening garage door noise. During lubrication, focus on these areas:

  1. Hinges: Concentrate on where they meet the bend of your door track.  
  2. Rollers: Use the straw that comes with the lubricant container to get into smaller areas of the rollers. 
  3. Top of the rail where the chain rides: For increased effectiveness, spread the lubricant around with a rag.

You won’t need to lubricate the chain itself since it already has a natural grease lubricant. 

Contact Hunter Door Today

For best results, contact Hunter Door to have a professional lubricate your garage door. Request a service estimate today!

Preventive Maintenance Tips to Keep Your Garage in Optimal Shape

Preventive Maintenance Tips to Keep Your Garage in Optimal Shape

If you own a home that has a garage, you likely have run into issues with your garage door. Whether the door is abnormally noisy or has come off its tracks, having a broken garage door can be stressful and inconvenient.

While you want a professional to complete any repairs or replacements, there are a few maintenance tasks you can do yourself to help your garage door continue to function its best.

3 Garage Door Maintenance Tips

You can prevent many garage door issues with regular garage door maintenance. Check out these three tasks you can do yourself to help keep your garage door in the best shape possible.

1. Tighten Hardware

Opening and closing your garage can cause bolts and hardware on the door to loosen over time. This loosening is a normal occurrence that causes some common problems, such as throwing off the door’s alignment and preventing your door from functioning properly.

Tighten your hardware by taking a wrench and double-checking each bolt to make sure it’s secure. By doing this, you can help avoid potential damage to your door and an expensive repair bill.

2. Lubricate Moving Parts

One of the easiest and most important tasks to prevent garage door damage is to lubricate moving parts, such as the rollers and hinges. Your garage door opens and closes numerous times throughout the day, causing the metalworking parts of the door to rub against each other frequently. Over time, unlubricated parts can begin to cause wear and tear and keep your door from functioning properly.

3. Check the Balance of the Door

A common cause of your garage door opener not running properly is that your garage door is off balance. An off-balance door will cause a garage door opener to have to work harder than it should and eventually cause the opener to break due to strain on the motor. 

To check if your garage door is off balance, disconnect the power and pull the garage door halfway up manually. As you release the door, watch to see the speed at which it falls back down to the ground. If it falls too slow or fast, your garage door is off balance. 

If your garage door does end up being off balance, it’s best to leave the repairs to the professionals to prevent injury to yourself or further damage to your garage door.   

Call the Experts at Hunter Door

If you are unsure how to fix your garage door correctly or are unable to find the cause of your garage door issue, a garage door professional is one call away. Contact Hunter Door today to learn more!

Book Online